Decompiling Java Classes
While there are many tools that we could use to decompile Java bytecode (with various degrees of success), we will use the JD-GUI decompiler in this course. Java-based web applications primarily consist of compiled Java class files that are compressed into a single file, a Java ARchive, or JAR, file. Using JD-GUI, we can extract the class files and subsequently decompile them back to Java source code.
Let’s demonstrate decompilation in JD-GUI with a test JAR file. We’ll create JAR/test.java on our Kali machine:
1
2
3
4
5
6
7
8
9
10
import java.util.*;

public class test{
	public static void main(String[] args){
		Scanner scanner = new Scanner(System.in);
		System.out.println("What is your favorite Web Application Language?");
		String answer = scanner.nextLine();
		System.out.println("Your answer was: " + answer);
	}
}
This basic Java application prompts for the user’s favorite language and prints the answer to the console. As part of the compilation process, we also set the Java source and target versions to 1.8, which is the current long-term suggested version from Oracle.
For this section, we will need a Java Development Kit (JDK) to compile the Java source. If it is not already installed, we can install it in Kali with “sudo apt install default-jdk”.
1
2
3
kali@kali:~$ javac -source 1.8 -target 1.8 test.java
warning: [options] bootstrap class path not set in conjunction with -source 1.8
1 warning
After compiling the source code, test.class is written to our JAR directory. In order to package our class as a JAR file, we will need to create a manifest file. This is easily accomplished by creating the JAR/META-INF directory and adding our test class to the MANIFEST.MF file as shown below.
1
2
3
kali@kali:~$ mkdir META-INF

kali@kali:~$ echo "Main-Class: test" > META-INF/MANIFEST.MF
We can now create our JAR file by running the following command:
1
2
3
kali@kali:~$ jar cmvf META-INF/MANIFEST.MF test.jar test.class
added manifest
adding: test.class(in = 747) (out= 468)(deflated 37%)
Let’s test our example class to make sure it’s working properly:
1
2
3
4
kali@kali:~$ java -jar test.jar
What is your favorite Web Application Language?
Java
Your answer was: Java
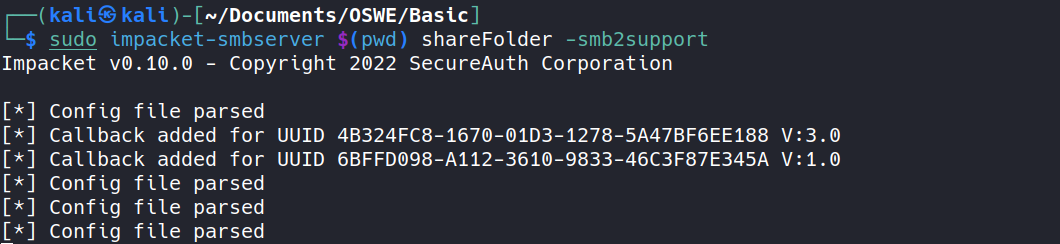
Great! Now that we know our JAR file works, let’s copy it to the machine running JD-GUI. One easy way to transfer files is via SMB with an Impacket script. In our JAR directory, we will issue the following command:
With our Samba server running, we need to connect to the ManageEngine server with xfreerdp. Refer to the course materials for the correct RDP credentials.
1
kali@kali:~$ xfreerdp +nego +sec-rdp +sec-tls +sec-nla /d: /u: /p: /v:manageengine /u:administrator /p:studentlab /size:1600x708 /tls-seclevel:0
Depending on our version of FreeRDP, we might receive an ERRCONNECT_TLS_CONNECT_FAILED message when attempting to connect to the DNN machine. If so, we need to append /tls-seclevel:0 to the end of our command to allow for any TLS level on our connection.
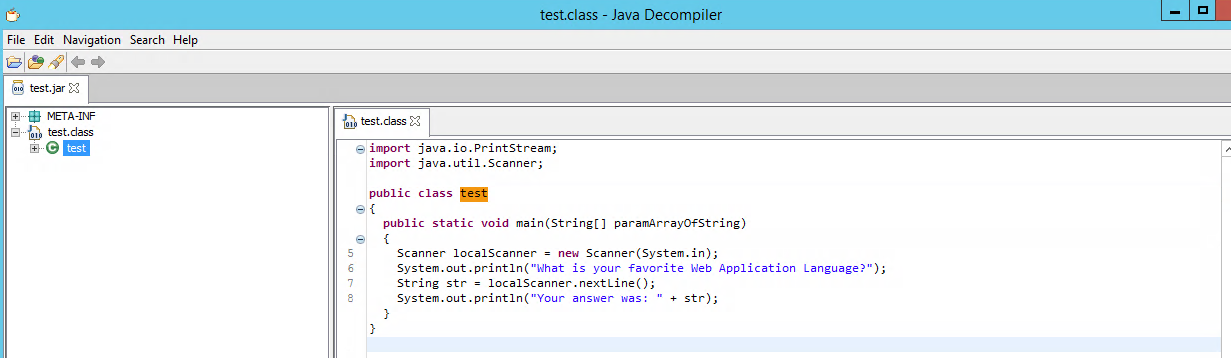
Once connected to the ManageEngine server, we’ll use Windows Explorer to navigate to our Kali SMB server using the \your-kali-machine-ip\test path. We’ll then copy test.jar to the desktop of the ManageEngine virtual machine. Finally, we can open JD-GUI using the taskbar shortcut and drag our JAR file on its window.

At this point, we should be able to use the left navigation pane to navigate to the decompiled code in JD-GUI
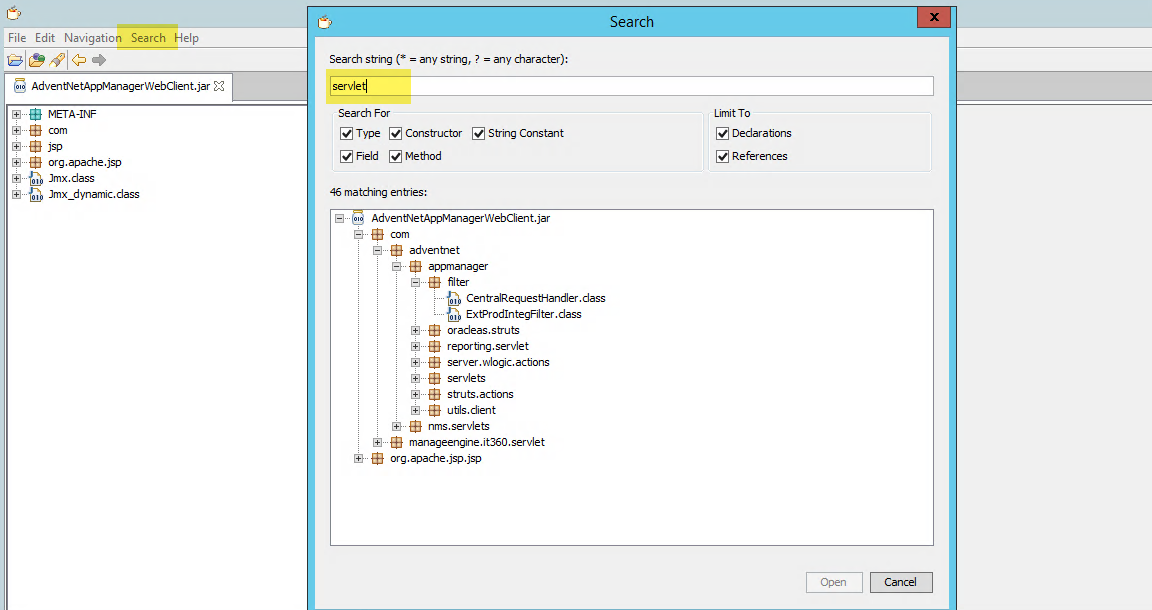
We can also search the decompiled classes for arbitrary methods and variables with JD-GUI. However, the user interface is non-intuitive and may be cumbersome when used with large and complex applications.